This is the first blog challenge I have ever done. It was great fun, so thanks to Emma at Puddle Side Musings and Myra from Those Secrets We Keep for suggesting it. The challenge was to make a paper bag book, any style. Actually just checking back I see the word used was ‘album’ but I now have ‘book’ in my head.I think they are the same thing! I watched the videos on Emma’s post, and then another popped up, which was the one I ended up using as my starting point. Fingers crossed this works…Beware of the volume if it does!
I liked this challenge because I had all the supplies I needed to get going. Having said that, almost EVERY project for anything I see on YouTube or US blogs mentions ‘I got these at Michaels’ or I got these at Home Depot‘. Can these stores please think about branching out to the UK? Particularly South London? I can give you a post code….I can rent you a room…
Anyway, as luck would have it I have a sack of brown paper bags. What can I say? I was going through a rustic phase with gift wrapping, plus I fell for the bulk buy discount. Badly. The good news is I now have a new use for them!
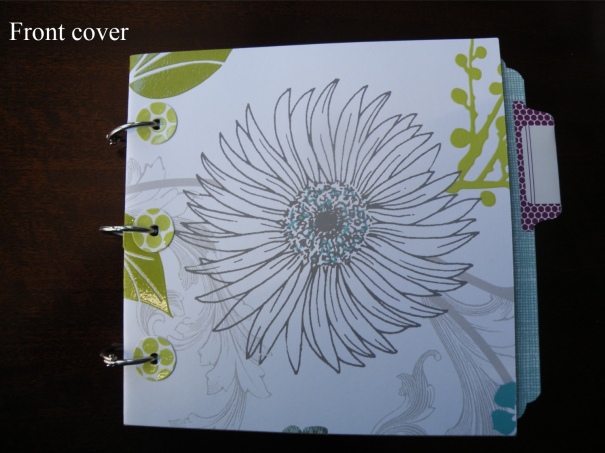
I also had an old SEI kit called Bridgeport, (almost) still unused, so I didn’t have to think about matching papers, which saved a lot of faff. These are not my usual colour palette but I do like them a lot.

So, what did I learn as I was going along? Some things are obvious, some not so much.
Firstly, think about what papers will face what in the finished book. Obvious to scrappers, maybe not so much for card makers.
Crease, score and score again. All the time.
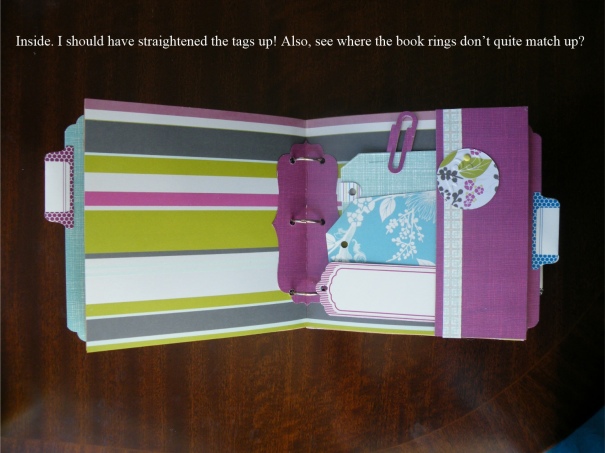
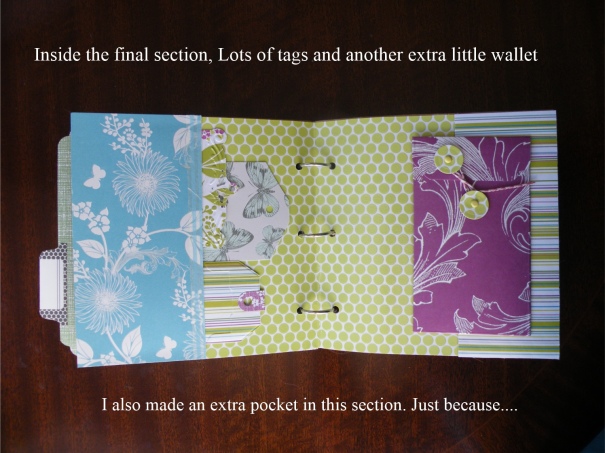
If you keep the page order as ‘tuck in pocket’ (the bit I have the tags in) first and larger pocket (photo mats) second it will be stronger at the covers. The video I followed didn’t do it that way. I realised this, was dead proud of myself, then forgot to do it.
If you are a bit of a sieve-head like me sometimes, make a note of thing like this in case you have an overnight brain wipe.
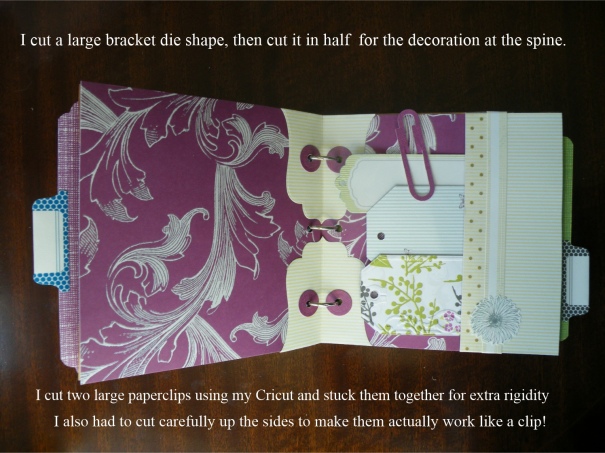
If you use die cut shapes to add detail to the centre join then use your tool to score the fold line here too as this makes a better crease.
Square it up every now and again – mine is a bit off but liveable with.
I messed up with the hold punching. I thought I had it sussed, and this was the plan.
1. Measure and punch the holes in the middle section of the book.
2. Use these holes as a guide for the front and back sections, so they should all line up ok.
This is what actually happened.
I measured in a bad light, so the top and bottom holes are not quite evenly spaced.
The guide bar on my Big Bite slipped and I didn’t realise so hole number three in the middle section was significantly out of whack.
Small hissy fit. And some sulking. And some sleep.
A grip was got. I re-punched the hole in the correct place, even though it joined up with the offending first hole. I die cut a multitude of circles from scraps of the papers and then turned them into hole reinforcers by punching a circle in them. These covered up the mistake a treat, and to be honest are probably a good idea anyway so I used them pretty much all over.
Some details: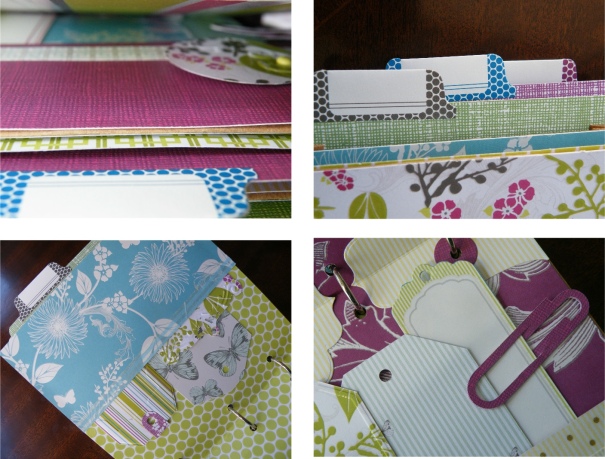
The video I watched said to use three bags. I think I could have got away with another, especially if I made a kind of band to go around it vertically at the fat bit, which I think would look good. The papers I used were partly embossed – almost plasticised for some – and this made them extra bouncy. If you don’t want that look, go for totally flat, no texture at all.
I am not sure it is completely finished yet: I might add some ribbon to the book rings, maybe. It is quite simple but I will try making another in a vintage style and might try loading that one up a bit more with embellishments and the like. It took some time to do, but really was great fun and I would love to make more. The best bit about it? The lovely squashy rustling paper noise it makes. Bliss.

That’s really clever! What a nice idea for a present and I admire your perseverance…I would have probably ripped it up and stamped on it a few times…
LikeLiked by 2 people
Nearly did that, trust me! I was going to say “don’t try something new at night” but then realised that sounded a bit ambiguous!
LikeLiked by 1 person
LOL!! No…I’ll stick to my book and a nice cup of milky brew. I’m still recovering from the finale of “Wentworth”…
LikeLiked by 1 person
No clue. Is it about golf? Does someone get a hole in one?
LikeLiked by 1 person
Australian prison drama, originally made in the ’70’s, re-made for the 21st century. It achived cult status at uni so I was overjoyed when its comeback was announced..lol!
LikeLiked by 1 person
Aaah. Still don’t know it. Would probably enjoy a nice gentle drama about golf more anyway…
LikeLiked by 1 person
Golf can be very dramatic- look at Tiger Woods!
LikeLiked by 1 person
mmhmm..and Rory McIlroy’s eyebrows..
LikeLiked by 1 person
At least the golf sweaters they wear now aren’t quite so…vivid…
LikeLiked by 1 person
1980s. Wanted for crimes against knitwear…
LikeLiked by 1 person
This is fantastic Gill! What a beautiful album you have made! I like to make journals and albums but haven’t made a paper bag album before! The video demo looks so easy and yet the album itself looks like it’s taken an age to work out all the pockets and pages! Once you’ve made one I bet they’ll be really addictive to make! Thanks so much for including the tutorial here, it’s definitely something I’d like to try – once I’ve caught up with my Christmas cards…
LikeLiked by 2 people
Thanks! They are easy, and there is actually very little working out to do, especially if you don’t make a mistake. I think they have lots of possibilities. I also need to tackle Christmas head-on soon…
LikeLike
Really well done! I like the random pockets, just because. 🙂
LikeLiked by 1 person
Thanks. It’s as good a reason as any!
LikeLiked by 1 person
Beautiful! Thanks for sharing your “lesson’s learned”! And, truly sorry about Michael’s and Home Depot… 😉
LikeLiked by 1 person
Thanks. Maybe I should write to them direct….
LikeLiked by 1 person
If I find a physical suggestion box the next time I am in one of the stores, I will drop in “stores in England!”.
LikeLiked by 1 person
That would be GREAT! If no actual box is there, could you make one?!
LikeLiked by 1 person
I will! Covered in scrapbooking paper, of course!
LikeLiked by 1 person
Aww Puff! What a beautiful result! I remember my first paper bag album … dear dog in heaven, I got into such a pickle trying to work out *this* goes *there, and the I fold*this* over *here* to make the other part work like *that*.
I can remember sitting at my desk which was littered with papers, bags, bits, trims, beads, flowers, tools and … a whole bundle of “well I messed THAT up big time stuff. In the end I scooped the whole lot into a big plastic box and didn’t look at it again until I’d done do other projects (cards) and calmed down.
So for you to produce such a lovely looking album first go, is fantastic.
It’s really lovely Puff. Well done, you clever thing.
Sending squidges ~ Cobs.x ❤
LikeLiked by 1 person
[sigh] … until I’d done *two* other projects. Not ‘do’ other projects. {dangerous if had brain}
LikeLiked by 1 person
🙂
LikeLike
Thanks. It is a very easy format – there were other much more complicated ones but this version looked do-able. I’m a big fan of do-able!
LikeLiked by 1 person
Wonderful project beautifully made.
Flo x
LikeLiked by 1 person
Thanks Flo! Xx
LikeLike
Nicely done! I love that magenta-colored envelope with the circle, brad and twine enclosures that looks like a bank book holder.
LikeLike
I ❤️ the last two sentences!
LikeLike
For sure! They sound and feel so good!
LikeLiked by 1 person
Oh my. I had never seen these before. What a clever idea! Yours looks great! If you didn’t tell us it was the first one you made, I would have thought you were such an expert! Great job. I just might have to give this a try! LOL! I’m in Michaels quite often. We use to have a locally owned craft store where I bought almost all of my supplies, but she retired and wasn’t able to sell the store. I have gone to ordering most of my supplies through the internet now. I seem to be able to find a better selection of items. Michaels seems to go through streaks where they have some of the most current things, and then the next time you go, the have changed things up and don’t have as many paper crafting things. They have a lot of craft items, but less and less for the paper crafter. They do have a web site where you can order some things now…not sure about international shipping though. Anyways, great project….and I wouldn’t have noticed any “mistakes” if you hadn’t pointed them out….besides I like projects with mistakes as that just makes them more interesting and much more valuable! You know it was made with a lot of love!
LikeLiked by 1 person
Thanks! I get most of my craft stash that way too. But there is something so nice about being able to wander around a shop and browse real stuff! You should definitely try one of these – think how beautiful it would be with your colouring and art skills!
LikeLike
This is fabulous, well done, you will now become addicted to making mini albums/(books). Here is a little tip I learned. I noted you said your tags should have been straightened up. If you use glue (I like Tombow Mono Multipurpose) and not double sided tape or tape runner, in the bottom of your pockets, when you push the tags inside the glue captures and holds them and they don’t move, or fall out. Just be careful that you allow the glue to go off a little before sticking down and don’t allow it to encroach too much into your pocket, so just a thin line of glue does the trick.
LikeLiked by 1 person
I should mention you can still remove the tags when you want to.
LikeLiked by 1 person
Thanks very much for the tip! Sounds like I need to make a purchase! Only this comment showed up in my notifications this morning for some reason, so I was a bit confused, then saw your first comment when I checked the actual post. WP issues again!
LikeLike
Yes, sorry I realised after I had posted that you may have thought I meant for you to permanently stick your cute tags in the pockets. The glue just keeps them in their little pockets.
LikeLiked by 1 person
Definitely a ‘top tip’!
LikeLike
I am so impressed! So beautiful!
LikeLiked by 1 person
Thank you! The sound effects are the best thing about them!
LikeLiked by 1 person
Wow, I absolutely love your paper bag album version! If you didn’t mention it, you’d never know you used paper bags at all! And I love the colours (gotta love paper kits that make decorating life easier by not having to think if the papers match 🙂 )
Also – I know the pain, I watch so many YouTube videos where they’re like ‘bought these in Michaels’’ to which my reaction is usually ‘noooooo!’ – pretty much limited to a local craft store and an art&hobby store where I live (thankfully both are really good but they can sometimes be a little bit more expensive).
LikeLiked by 1 person
Thanks so much. Sorry for delay in replying – I was away. I already have another album planned, and now my sister is hooked on the idea too. Thanks for the brilliant inspiration!
LikeLiked by 1 person
Haha, well, glad I was able to turn you on to paper bag albums then! They are pretty fun and addictive – I’ve already got three more lined up to make!
LikeLiked by 1 person
I had never seen or heard of these before but I will certainly try making some. I loved your colours. If mine turns out OK there will be more made as gifts! Thank you.
LikeLiked by 1 person
Thank you. Go see Emma and Myra too if you don’t already know them, as they are so creative and their blogs are a great read!
LikeLiked by 1 person
Will do. I love all things creative.
LikeLiked by 1 person
This album is beautiful and functional at the same time. I’ve never done scrapbook layouts or anything like this, but after looking at your project I want to try creating one! I have some paper bags, that are too good to throw away, but not that good to reuse them. This is a great idea! Thank you for sharing!
LikeLiked by 1 person
Thank you, but the sharing credit goes to Emma and Myra for suggesting it! Try one though, it is fun, and I am already planning more!
LikeLiked by 1 person
Yes, but probably I wouldn’t have ever found this otherwise! But my bags have different odd shapes and folding them in half won’t give me a square page… So I’ll have to figure it out.
LikeLiked by 1 person
I think you can still make it work? I am guessing, but if you keep the folded (base of bag) bits all square to each other at the fold that you create, then you even if the rest of you pockets and pouches are different sizes you can create a cover to go over all of them. I think it would look really good that way!
LikeLiked by 1 person
I think I can make it work with adding some more bags and cutting some others to fit, but I should get some rings and some more matching papers first. Or wait until Christmas for some more bags to come 🙂
LikeLiked by 1 person
Oh I love your Paper Bag Album. I adore the papers you have used, They are more my type of thing than the Graphic 45! So much fun. I must have a try some time.
LikeLiked by 1 person
Thanks so much. I have papers in just about every style going, so I can usually find something to suit the mood or the recipient!
LikeLike
I love, love love this creation of yours…you have so much talent!!!!
LikeLiked by 1 person
That’s very kind, thanks so much!
LikeLike
Reblogged this on kelleysdiy and commented:
A wonderful craft idea from Paper Puff
LikeLike