3D Thursday: home for the holidays?

Week four of my 3D Thursdays. I wasn’t sure I would manage to keep it up, but I have stuck with it (sorry!) and am having fun making little glittery things. Well, today it is one very little, very glittery thing.

I have used a Tattered Lace Shop die (bought last year) to make a Christmassy something. It could be purely decorative, or another Advent calendar piece, or even an alternative Christmas card or tree decoration.

Firstly I printed out some music score from the Hearts and Roses Christmas digikit using Serif CraftArtist. With uncharacteristic foresight I actually thought about where to position the die, so I have musical notes in the right places, as opposed to featuring the gap between the staves. Hurrah!

Next to crease and glue the shop (hereafter known as the ‘house’) together. I inked the house corners in silver to define them a bit more. For the roof I wanted a different colour and texture so opted for some silver glitter cardstock, cut to size, the edges trimmed with decorative scissors and then stuck over the existing roof. Like double glazing. Ignore the fact the windows are open to the elements. This is a house for tiny yetis. I also used the same scissors to cut slivers of glitter card for the base.

holiday-house-1

The wreath is highly technical. It is made by twisting a silver pipe-cleaner around a pen to form the circle, dolloping on some tacky glue in a very heavy-handed way and then dunking in a tub of glitter a few times so it gets a bit clumpy looking, like wet snow. Mission accomplished!

holiday-house-4

The finishing touches are a string of sticky pearls to gussy up the gable end and a banner greeting raised up on a double layer of 3D pads. Add one twinkly battery tea light and ta-dah!

If you fancy having a go you don’t need a die to do this. There are plenty of free templates for houses available. You might even already have a cookbook with a gingerbread house you could use. If anyone does make one I’d love to see!

Supplies: Tattered Lace Essentials Shop die (retired); Clearly Besotted Mini Basic Banners stamps (Christmas selection) and die; Brilliance Starlite Silver pearlescent ink; pearls from The Ribbon Room


Please, don’t eat the daisies!

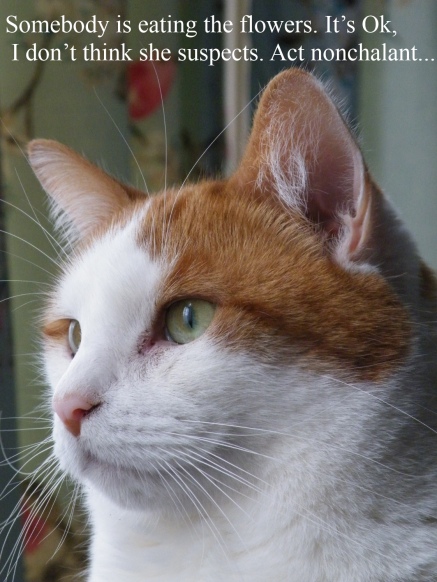
The title of a Doris Day film. Also, a sentence oft spoken in our home this week, in a slightly different way. As in no ‘please’ and no ‘daisies’. More like ‘Stop eating the flowers!’ or just ‘stopitstopitstopit’ whilst wresting the paper pulp from the cat’s jaws. Don’t get me wrong, it is nice that he involves himself with my hobby, but eating the hobby is not the way to go.

daisy-eating-riley

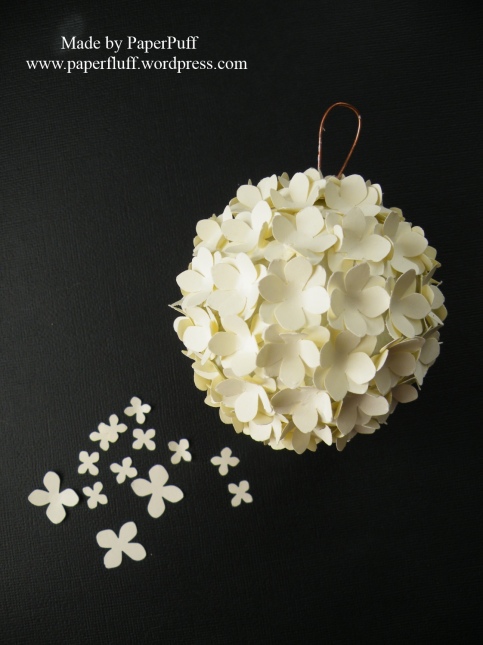
This is a WIP. My sister made some bare naked Christmas baubles (UK English) or ornaments (USA English. Hmmn, don’t know where Canada sits on this one?) to decorate. We thought it would be fun, given we both have quite large and very different stashes and quite divergent crafty leanings. I collected my orbs a few weeks ago but haven’t done much so far. I know I need to be more Christmas orientated but I think that is where I fall down. I really cannot get in the festive mood this early. But I had a naked ornament to decorate. Fun, right? I have never done this before. The base is a kid’s plastic ball, a wire hanger added and then covered in a textured papier mache layer.

Now to get going! I’m not certain where this particular bauble or ornament will end up, but it is a start. So with the ’not yet’ feeling in mind I deliberately travelled the ‘not Christmas’ road with my first effort, and started by punching many, many paper flowers to cover it with. In fact each flower you can see is two layers, offset a bit. I am not sure how many it took. I started making a circle around the middle, which took 16 whole ‘flowers’ for a bauble measuring about 6-7cm diameter. I had hoped I would just eyeball it and get a beautiful encirclement to meet up in the middle, without actually mapping or drawing it out. Fail to plan, plan to fail, came to mind as my circle was so ‘off’ by the time I had made it around the circumference once that one end was clearly heading north without a backward glance. To visit Santa, presumably. But actually it didn’t matter. Maybe I was lucky, but I just kept going and managed to cover it all without any odd gaps or some being more closely squashed together than others.

flower-bauble-1

I think I am going to finish it off with a gentle dusting of glitter and some pearls here and there. I may also cover the wire with ribbon or tissue paper. If anyone has any good ideas feel free to stick them in a comment – I have plenty more baubles!

Supplies (possibly the shortest list ever): a Martha Stewart punch. It hasn’t got a name on it and I bought it so long ago I can’t remember!