Countdown to Easter: Eggsbox, but no games

Making a mountain out of mini eggs

Easter eggs are not just for kids, or at least not as far as I am concerned. I like to gift a few mini eggs to friends and family too. But handing over a rather dull net of chocolate is, well, a bit humdrum, so usually I try to gussie them up a bit.

In previous years I have made little ‘shopping bags’ and folded pouches but I thought it was time to try something different. This presentation is not 100% successful. It is a bit wobbly and needs to go into a flat bottom cello bag for transportation (as in to the recipient, not to a penal colony). Also I am not wild about the foil wrapping on the eggs. It is a bit busy for my tastes but that is how they come. The hard candy shell eggs would have been better visually, but obviously hygiene prohibits the use of unwrapped items. I don’t think anyone would like a mouthful of glitter along with their chocolate. Or indeed a little bit of Riley now that we are in moulting season!

Still, the idea is ok, I think. I just made a quick box base from double sided gingham card and added a layer of with shredded paper. Shakespeare, in case the recipient should also fancy a jigsaw puzzle and some light reading. The outside is covered with multiple cuts of a picket fence die that was free with issue 144 of Papercraft Essentials magazine. Good free stuff!! Then I filled the box with some polystyrene eggs (from The Works) that had been covered in Martha Stewart glitter, one of my sadly deformed chicks and as many mini eggs as seemed feasible. Think of loading to the max a salad bowl, or a skip, whichever you can best identify with.

The final touch is a banner made with Clearly Besotted Mini Banners stamps and die. I cut the shape twice – once around the stamped image and once from plain gingham cardstock. I used red liner tape to fix an couple of cocktail sticks to the back of the stamped image and then 3D foam to cover the workings with the second die cut. A couple of Lawn Fawn Hoppy Easter eggs were hanging around so they got used too.

eggsbox1eggsbox3eggsbox2eggsbox4

Having stared at chocolate so much I am now off to eat some!


Countdown to Easter: make up your own joke about bunnies multiplying…

Firstly, an apology. I have been rather behind on replying to comments and checking out what everyone else is up to. I am, once again, having struggles with technology. From last weekend the internet has been on some kind of random strike action. It works fine for a while, then fades away. Comes back, fades away. Like some Gothic novel heroine, suffering an attack of the vapours.

I am also struggling with ongoing Reader and Notifications issues and then, because things always come in threes, I woke up with a swollen and painful eye, streaming nose and a banging headache. Peachy. I couldn’t see well enough to use WordPress for anything more than a few minutes at a time, nor could I get stuck in to anything creative. It has now improved significantly and I think it may have been an allergic reaction or a foreign body of some sort causing irritation (I have summarised enough medical records in my time to self-diagnose pretty accurately!!). I suspect it may have been glitter….

So, yesterday I was finally at least able to rustle up a little something, whilst squinting. This first card is made with Lawn Fawn Hoppy Easter stamps and dies and some Martha Stewart papers I have had for years. The tag die is from a set of three that was a magazine cover gift years ago and the cute row of crosses are made with Die-namics Basic Stitched Lines.

hoppy easter tag trio

The second card is more of a Heinz 57. I used the same Lawn Fawn bunny, scraps of the Martha Stewart papers and the free tag die again. The Easter egg and small bunny dies are another free gift, from Docrafts Creativity magazine recently. The embossing folder is from Teresa Collins and I think it is called Modern Stripe. I am on a mission to use up some of my doily mountain too. Gonna take a while…

hoppy easter bunny and eggs

Now have you every worried about your brain?! About some vital bit of rational thought just not occurring? Here is my recent example giving cause for concern. Feel free to laugh at or despair of me.

I bought this box of chicks on a whim a couple of weeks ago, because they were quirky and cheep (sorry) and I thought I might use them for photo props.

easter cards 012

At the point of purchase I wondered why they all sported Mohican haircuts. But then they do have specs and ties too so I guess my brain concluded that clearly anything goes. Perhaps it was some character franchise of which I was unaware? Or just the latest ‘thing’, maybe? Like loom beads, deely boppers, hula hoops, yo-yos….

Anyway, they have been sitting in their box on my workdesk and every day I have looked at them and mentally shook my head at the Mohican bit. Yesterday I decided that I would open the box and try and give one a haircut, take him back to the yellow only. Don’t get me wrong, I have no objection to a Mohican, but not on my chicks, I think.

And of course, as soon as I uncovered them and took one out, I realised my mistake. But for two weeks my brain has been fooling me and unquestioningly substituting a random hairdo for a (vaguely) appropriate anatomical feature. NOT a good sign!


Countdown to Easter: bunnies, Martha Stewart and Chopin

No, this is not one of those ‘if you could invite anyone from history to a dinner party’ conversations. Last week, on a whim, I bought a bag of polystyrene bunnies from The Works. At £1 for six little hoppers (well three large, three small, actually) it seemed rude not to.

I have a thing about 3D objects covered in glitter. It has to be good glitter though, so the colour is important – not ‘unwell urine yellow’ masquerading as gold. Years ago I bought a set of Martha Stewart glitters. Actually I liked them so much I then bought a second set in case they were discontinued or there was a worldwide glitter shortage. Luckily glitter hoarding is not a crime. I still have two practically full packs because a little goes a long way, but they are the BEST colours so I regret nothing. No wait, I regret shoulder pads…

I also have a thing for book pages or sheet music used in decorative items. So, a perfect opportunity to indulge both. It is healthier than chocolate. Amazingly I have never been tempted to lick glitter. Or sheet music.

So, to bunny number one. I decided to cover him in torn strips of the sheet music. I actually don’t think I have ever done this before with a complicated shape, but I had 6 bunnies to play with and plenty more in the shop if it went wrong. I mixed pva glue and water in approximately the usual 2:1 ratio and added some mica powder to colour it. I partly spread glue thinly on the bunny, partly doused the sheet music strips and just covered him as best I could, working the paper in to the creases with a firm brush. For sections like the side of his face and ears I found it easier to then tear another piece approximately the right shape and glue it over the top. He was set aside to dry a bit, then given another coat of the pva/mica for an extra glossy finish.

Bunny number two was glitter time! Again I have never covered a polystyrene shape like this before. I actually used the same tub of pva and mica because I had mixed up far too much. I thought the colour might taint the glitter a bit but there was no problem. The only difficulty was choosing what glitter to use, but eventually I plumped for Kunzite, a lovely dusty pink. If you have never covered shapes like this, just use a really, really thin layer of glue. You can always touch up any bald patches afterwards but if you put too much on you end up with dripping or sliding glue, and your bunny will have wrinkles prematurely. Might end up looking more like an Easter rhino or one of those pop-up ads for miracle face creams.

Now, I kind of wanted to add a bit more decoration to my bunny couple, but I am also of a ‘less is more’ tendency, so minimal accessorising was preferred. I made a tiny little crown/tiara thingie for Rosa, which of course elevated her status to Princess, and in the end just a simple bow for Mr Noteworthy. A woman should never be upstaged by her consort.

noteworthy and rosa


3D Thursday: sometimes it isn’t rude to point

This is a WIP post. This week I enjoyed reading the results of a couple of Pinterest projects from gillyflower over at Wood So Wild (very cool blog). It is so useful when a ‘real’ person attempts some of these things and lets you know the outcome. I really liked how her sea glass turned out!

As of this morning I had a big fat nothing prepared for 3D Thursday so no post, or a quick project was the order of the day. Nothing like a deadline to sharpen the mind! Then I remembered that a while ago, whilst Pinterbinge-ing (as in looking at Pinterest for way longer than is healthy) I came across a link showing how to make a five-pointed origami star. Hurrah! So gillyflower is my inspiration today and I am very grateful!

I did my searches and found the site here. I watched both the videos – one to make a pentagon and one to make the star, then went for it with a sheet of copier paper to practice. This is the first star I made.

origami-star-white

Not bad, huh? Of course I had to pause the videos several times to catch up: I haven’t done much origami since I was a kid and am a bit rusty. But don’t worry, you definitely do not need a black belt in origami to do this.

Once I had made the initial pentagon shape I was a bit concerned about all the random score lines, but most of them became integral to the star shape. If I was doing a lot of these stars I would probably make some pentagon templates to save a bit of time, but to just get a couple done whilst there was still some daylight available, and in case we get yet another power cut, it was as quick to make them from scratch.

The papers I used are single-sided. Initially I was looking for double-sided as per the website but once I watched the videos I realised you only see one side anyway. Mine are good quality 12 x 12 inch K&Company that my sister bought for me when I started card making. I love them so much I use them sparingly! Actually the quality probably made the folding a bit trickier, so you definitely want to use paper weight only. The end result is better with the quality paper though, so it is swings and roundabouts!

The trickiest bit I found was the very last fold, but it just needs a bit of finagling and you are fine.

origami-star-pair

I had just enough time to get some of my lovely Martha Stewart Smoky Quartz glitter on the edges of one star and take a couple of photos. I was trying to catch the glitter in the sunlight, but no luck. You will just have to believe me when I tell you it looks not too shabby at all.

glitter-star-detailglitter-star-single

So, I made three stars, they all worked, and by the time I was making star three I had most of the fold sequence in my head and could (almost) do it as quick as the demo chap. So it is easy, believe me!

I said at the top they are a WIP, because of course you could add all sorts of things to them. I have an urge for jingle bells on the points. Maybe I am just getting confused with jesters’ hats?


3D Thursday: Gilty pleasures

I have been playing with the Christmas ornament ‘blanks’ my sister made again. I previously posted a WIP, which I think I may have now ruined. More of that in another post perhaps. However, this is bauble number two. Just to explain I will be freely switching from using ‘bauble’ to ‘ornament’ and back again, partially so I make sense to the majority of those I know read my blog. Also, whilst a big fan of the English language and a stalwart supporter of using a wide vocabulary, I HATE the word bauble. It sounds vaguely anatomical, like an appendage or a minor organ, maybe something that is prone to swelling and bursting, akin to the appendix. Got an attack of bauble bursitis. Ouch!

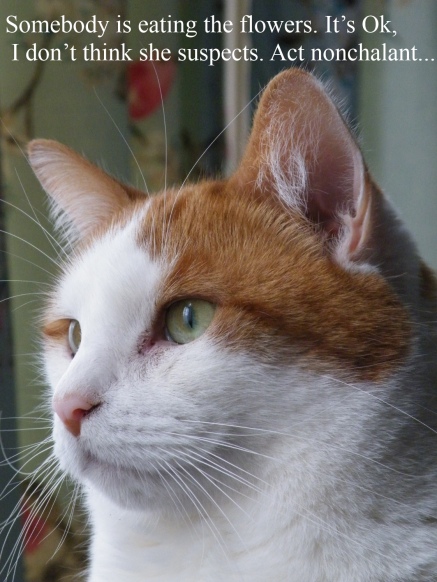
Anyway, enough of the inside of my head for now. Here we have ornament number two. I started off by covering it with IndigoBlu gilding flakes in Winter Dawn. Can I say that this is not an endeavour which should be undertaken lightly. There was A LOT of mess, and most of it was stuck to me. I tried to keep one hand ‘clean’ and one hand sticky but it was just not possible. By the time the whole bauble was covered, at least 40% of the surface of my hands was too. Then the cat came along and somehow got a large gilding flake on his nose. Some comedy hissing and ‘pffing’ ensued. Him, not me. Obviously I did not want him to ingest it. I was pretty sure the manufacturers would not have thought it necessary to include any details about whether it was safe for cats to eat. In all fairness, they should not be expected to! So I attempted a pre-emptive snatch and grab (still with my heavily gilded fingers), which of course Riley (cat in residence) eluded. But I couldn’t assume the large flake was not stuck to him – the state of my own paws were evidence this was a definite possibility. So, the chase was on.

Anyone own a cat? Anyone know that a lot of them don’t like tin foil (maybe called kitchen or baking foil too)? Yep, Riley is one of them. I always thought it was the noise the foil made but, seeing me approaching with hands that have suddenly become reflective from all the silver gilding flakes and glue (believe me, it is good glue ‘cos everything stuck fast), well he was either genuinely freaked or just decided it was a good opportunity for a game. After haring up and down stairs chasing him a few times I was satisfied that he was a gilding flake-free zone. I, however, had added a couple of interesting hand prints to the banisters. Oh joy, I thought.

Back to the bauble. The reason I was all glued up was mostly because I was trying to cover a round object; so, holding it, applying the glue to an area and then turning it meant I just. Got. Sticky. I could have done smaller areas at a time, but I was rushing; and maybe latex gloves might have been sensible, but hey, we learn by our mistakes. It was user error, not the fault of the product. You can’t blame a good glue for being good! Once the ornament was all flaked up I just went in with the sponge and gave it a buffing to remove the loose or partially stuck flakes. This is when you can really see the results of your efforts. So, the orb was now covered and the next stage had been inspired by my thoughts on the handprint on the banisters, which in a way was serendipity, or payback, whichever way your mind works. I had an Anna Griffin ’joy’ die which I dug out, cut from gold card and then covered in Martha Stewart Copper glitter, to match the hanging loop. If anyone is wondering ‘why gold card?‘, the answer is that I don’t have any copper coloured, and if you want a coloured glitter to show up really well, stick it onto something which is as close a colour match as you can get. If you put it on white it just doesn’t pop in the same way and black can change the colour quite radically. I tied two fairly extravagant bows of double-faced satin ribbon, and glued them to the top of the ornament so it looks nice from both sides. Then added the copper sparkly ’joy’ and job done.

joy-bauble-1

Photo taking was a bit of an adventure. It is really not easy to do a bauble justice if you don’t have a tree to hang it on! I held it in the sunlight (I know, sunlight in the UK in November. Put it in your diary!) to show how sparkly the copper glitter is.

I also wanted to hang it though, so rigged up a makeshift hook from a silver pipe cleaner, pegged some black card to the curtain and hoped for the best. Here is the ‘warts and all’ zoomed out shot!

joy-bauble-photo-booth

I bought these gilding flakes quite some time ago now and I haven’t used them nearly enough. You can use stamps with the Flitterglu or like I did here, cover a whole area. The tubs of flakes are in single colours or several different colour combinations, some warm coppers, rose and gold and some cool greens and silver with slivers of gold or copper too. All are luscious. Please excuse me, I gotta go gild something. Where are the gloves?


Please, don’t eat the daisies!

The title of a Doris Day film. Also, a sentence oft spoken in our home this week, in a slightly different way. As in no ‘please’ and no ‘daisies’. More like ‘Stop eating the flowers!’ or just ‘stopitstopitstopit’ whilst wresting the paper pulp from the cat’s jaws. Don’t get me wrong, it is nice that he involves himself with my hobby, but eating the hobby is not the way to go.

daisy-eating-riley

This is a WIP. My sister made some bare naked Christmas baubles (UK English) or ornaments (USA English. Hmmn, don’t know where Canada sits on this one?) to decorate. We thought it would be fun, given we both have quite large and very different stashes and quite divergent crafty leanings. I collected my orbs a few weeks ago but haven’t done much so far. I know I need to be more Christmas orientated but I think that is where I fall down. I really cannot get in the festive mood this early. But I had a naked ornament to decorate. Fun, right? I have never done this before. The base is a kid’s plastic ball, a wire hanger added and then covered in a textured papier mache layer.

Now to get going! I’m not certain where this particular bauble or ornament will end up, but it is a start. So with the ’not yet’ feeling in mind I deliberately travelled the ‘not Christmas’ road with my first effort, and started by punching many, many paper flowers to cover it with. In fact each flower you can see is two layers, offset a bit. I am not sure how many it took. I started making a circle around the middle, which took 16 whole ‘flowers’ for a bauble measuring about 6-7cm diameter. I had hoped I would just eyeball it and get a beautiful encirclement to meet up in the middle, without actually mapping or drawing it out. Fail to plan, plan to fail, came to mind as my circle was so ‘off’ by the time I had made it around the circumference once that one end was clearly heading north without a backward glance. To visit Santa, presumably. But actually it didn’t matter. Maybe I was lucky, but I just kept going and managed to cover it all without any odd gaps or some being more closely squashed together than others.

flower-bauble-1

I think I am going to finish it off with a gentle dusting of glitter and some pearls here and there. I may also cover the wire with ribbon or tissue paper. If anyone has any good ideas feel free to stick them in a comment – I have plenty more baubles!

Supplies (possibly the shortest list ever): a Martha Stewart punch. It hasn’t got a name on it and I bought it so long ago I can’t remember!


A sapling of mojo

Wish it could have been a sampling of mojito instead. Actually I have never tried one. They might taste like toilet cleaner. Also, for the record, I have never tried that either.

My mojo has been totally and completely absent the last couple of days. Not the tiniest, tiniest little bit of inspiration was to be found. Then, today, I saw something in a shop window that was grey and only-just-off white. Whilst not exactly a lightning bolt from the gods of craft – more of a damp bit of kindling that fell off the barbecue really – it has at least started me off again, a bit. A tiny little sapling of mojo in an otherwise barren land. Still think a mojito might have been better.butterfly dotty card

This is not perfect, but it is a restart, which will do me for now!

I used  my Polka Dot stamp from The Ton. The vellum butterflies are made using a really old Cuttlebug set that has one shape die and four embossing folders – brilliant. The smaller butterflies are made using a Martha Stewart punch.


Rediscovered Roses

I’m still rediscovering stamping. The inky kind, not the hissy fit kind (although sometimes the latter is tempting). This means trawling through boxes of old stash, usually looking for one thing and finding another. Sometimes I have no idea what possessed me to buy the sorry item I have found, but sometimes a little nugget of gorgeousness fights its way to the surface and winks beguilingly at you, just begging to be used. This has just happened. Whoo hoo!

It is Wednesday, so it has to be quick and easy again. “No point in adding extra pressure by trying to produce a midweek masterpiece” was my original resolve when I decided to try and make a card a day. I have already flunked that anyway, and now I have for some mad reason decided to up the ante and sometimes try for two! I can’t even explain or justify the logic of this to myself…

This Darkroom Door stamp is divine, and straight away a couple of ideas popped into my head. Here is the simplest one to accomplish:

Cream and grey look classy and a bit softer than cream and black – although I love that combination too! The embossing folder is from Tonic, the punch is a Martha Stewart one and the heart was in a mixed batch of embellishments that I have also had since for ever.

OK. now off to try and rustle up card number two…..it might be a plaster stuck on a blank card with Get Well Soon scribbled underneath it….would that count??


Shiny HAPPY, people

I hope REM don’t sue me….

Just a quickie as my new dies to make heart-shaped boxes arrived today and I can barely wait to have a go.

Apart from drying time for the shiny wordy (this is what they are now called in my head), this is a super-quick card to rustle up. Whilst I was making yesterday’s effort I figured I may as well do a second word too, in case the first was a washout. So I have a shiny HAPPY sitting looking at me. Also left over from Sunday’s post I have another stamped flower which I can quickly fussy cut. Two scraps of the old faithful black and white striped paper, and 3d foam of course. I try to make some things flat for postage cost reasons but, like an addict, the hand reaches for the foamy stuff every time. Stick, layer, and we are done.

Martha flower and happy

martha flower happy detail

Black and pink again, I know!! But if you want something quick, it makes sense to use colours you know will work.

The HAPPY die is taken from a Tattered Lace birthday sentiment die.

Lobster, anyone?

Today I have been communing with nature. Well actually I have been doing some gardening for my mother. I am not designed for gardening on warm days. After about 5 minutes in the sun I fry better than bacon. It’s not surprising really, it’s in the genes, can‘t fight it. My grandfather got sunstroke. In Ireland. In March. Really.

So, mum’s garden looks tidier, and I look a mess. A living illustration of Newton’s law in glorious technicolour. Well, lobster pink, anyway. I am back to work tomorrow (booo) after a lovely week off and still have a million things to do, but I also want to make something, because I am trying to make something daily, but it will have to be something quick. That’s a lot of somethings and a lot of making!

No time for dawdling, decisions will have to be snappy. Yesterday I found (yep, looking for something else again) an ancient Martha Stewart set of stamps that actually look quite current. I also have a half-finished stamped background. Half finished because it is just plain stripes, completely adorable, nightmare to stamp. I have tried it many times and just get a patchy image each time. I’m not giving up on it though, I just might need to go trawl the internet for tips on how to get a good result. I’ve tried dye and pigment, putting the card on top, underneath, even made up my own sandwich and tried running it through the die cutter but no luck. Not to be defeated in the meantime, in idle moments I have been painstakingly masking off each stripe and inking them again individually to get that dark, dark shade I want. Nuts, I know, but I don’t care! Two stripes left, won’t take long.

I used Altenew ink on the flower and sentiment, fussy cut the flower, trimmed it all up a bit. Something glittery was required – I remembered some sticky tape I found in a supermarket stationery section. Now I wish I had bought more!

For what was more or less a rush job I am pretty pleased with it.

Hope everyone enjoyed the sun today and if you have any suggestions on how to make my stamp work better I’d love to hear them.

P.S – I should have said the stamp is 15cm square, red rubber on cushioned mount. It is not on a wooden base xx