A problem with time

Early warning, this is a post with a tiny little rant. And a card, of course, so you can just skip to the pictures if you want! Well obviously you can do that anyway….!

So, the rant. Let’s start it with a question, in case I am completely out of order here and should be told to button it. Have the rules about telling the time changed? Has there been a vote in Parliament that didn’t make it onto the TV news, or wormed its way into any conversation I have had recently? I ask the question because there is precedent here. Usually ‘Pacific’ is the name of an ocean, we know that. But some people got ‘Pacific’ and ‘specific’ confused, often. Then somehow, over time, all those muddles became one big puddle (no, wait, that’s a different ocean) and now it seems more generally accepted that swapping the two happens, at least colloquially. Interesting that a word indicating the vastness of the seas is used as an alternative for a word meant to drill something down, to identify the particular. Go figure.

Anyway, back to the time telling problem. Recently I have become aware of a new way of doing it. On TV, in conversation and out there on the internet. Sorry if the language offends you as much as it does me, but I have to repeat it so you know what I mean. Brace yourself, here goes. Last week a TV presenter said, three times within a few sentences “2.30AM in the morning”! I know. I will was my mouth out with soap later. Or maybe just give my keyboard a rinse?

He was not the first, and of course since then I have seen and heard it so many more times. But why? Why the “AM” and the “in the morning”? We all know either one is fine and we don’t need them both, but apparently now we cannot be trusted, or are considered too lazy to understand on our own and have to have it double-defined!

So, before I write to the Queen, I just thought I would ask if the rules of time have been changed?

And here is the card I mentioned. A sneeze of embellishments in a pile. Hope you like it.

embellished rosetteembellished rosette detail

Supplies: Spellbinders heart die (from a nesting set); Dreamees small dotty background stamp; Tattered Lace sentiment stamp; Hunkydory Adorable Scorable card in Pashmina; Fabric ribbon from The Works; Adhesive pearls from Poundland

Bridesmaid Revisited

Sorry Evelyn Waugh.

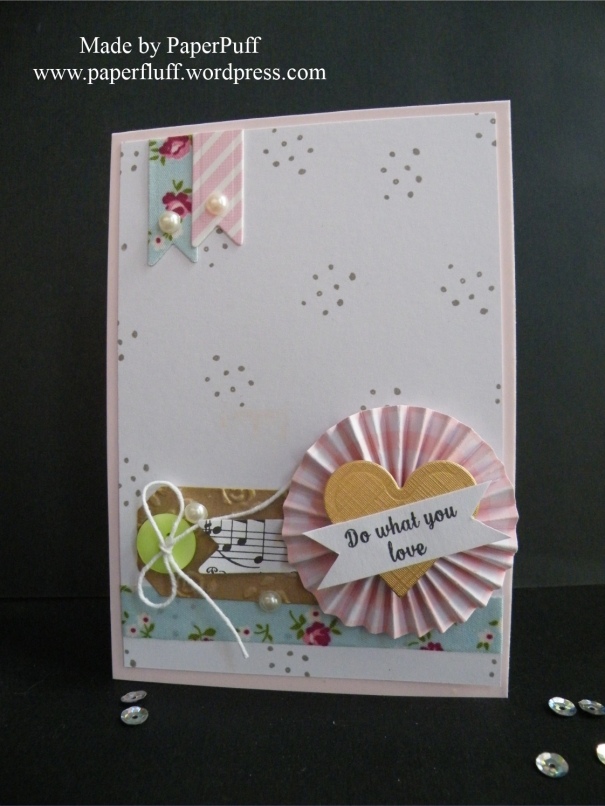
One of my lovely aunts has got married. So, some paper craft was called for and I had a chance to rustle up a little something. Well, two little somethings, actually. I felt rather out of practice, to be honest, using paper and card again after a bit of a break. Inspiration was somewhat tricky, and I had a few epic fails, but overall I am happy with what I have made in the time I had.

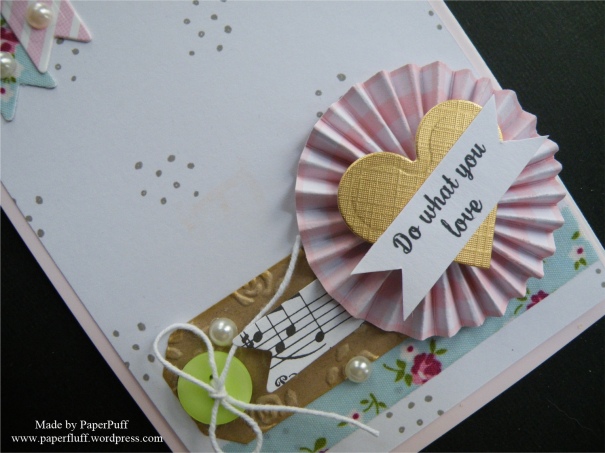
It is a second marriage, so I didn’t want to use any bridal dress imagery, but any wedding is a happy event so a few bells and whistles are not out of place, right? So, and hearts and pearls for nuptials.

wedding-congrats-1wedding-congrats-detail

My one and only experience as a bridesmaid was at this aunt’s first wedding, back in the 1970s. Being the youngest sister in her family, unfortunately Auntie C had little choice but to select all of her elder sisters’ female offspring as bridesmaids. All five of us, ranging from about aged 10, to aged 2 or 3. She had my sympathy, even then. My sister, as a the eldest, was head wrangler chief bridesmaid. Not an easy job, and she was possibly suffering from PBSD (Post Bridesmaid Stress Disorder) anyway, as she had filled the role once before, years earlier, for another aunt, and lost her headdress down the toilet….

We were so excited about being bridesmaids. I think that is why Auntie C couldn’t refuse any of us the chance. I don’t suppose she really relished it, but bless her, she never let on. I do remember a LOT of talks about being on best behaviour from every other adult that knew us though.

So, in Britain in the 1970s, or at least in our corner of it, weddings were rather different to now. Rather more low key; a ceremony and a bit of a house party with family and friends rather than the larger affairs that take place in the 21st century. I can’t help but think that the 1970s version had something going for it. Everyone chipped in, got involved. And although obviously it cost money, it could not have been anything like the frankly astonishing amount that the average wedding costs today. Plus, less pressure for the ‘perfect day’ to remember. A church, a frock, some photos, a party, super.

Actually it is probably good that ‘perfect’ was not expected.

Back to the delirious bridesmaids. Our dresses were handmade by, I think, my mum and her other sister Auntie B (mother of the other three bridesmaids). They were yellow, broderie anglaise, lined (for extra swishiness, I assumed, probably modesty and a touch of luxury, in reality), with peter pan collars and puff sleeves. We were all pretty much in love with the frock. Then shoes. Ballet shoes. Some cups of happiness ran over.

Now, here is where it could have ended. But, for a reason which has never been explained to my satisfaction, headgear was apparently also required. Perhaps it was the fashion, I don’t know. I was a kid. But if I had known the acronym ‘WTH (polite version) were you thinking?’ well it would have been extremely apposite right then.

We had yellow bonnets, made from scratchy net, like you would use for a tutu. When I say bonnet, think of those thingies that Cosmonauts wear under their helmets. So really, a skull cap, covering the whole head. And wreathed all over in several big, big, big fake white and yellow flowers. Kind of like a swimming cap from an old Esther Williams movie, but feeling more like a pan scourer. Then, it was fastened with a mahoosive bow, under the chin. Maybe my sister’s previous experience was being considered. Lash it to them, so they can’t lose it.

As if this wasn’t enough, I was also the object of scientific experimentation. My hair was permed. Apparently, it was because it was ‘so fine’ (as in thickness, not as in splendour). But then it was covered up with an enormous floral ritual offering, so why bother?! I don’t think Social Services would allow it these days…

So, the wedding day. We were of a generation that was taught to behave in public, do what you were told, drilled, even, by the adults who wanted the ceremony to go well. In a Catholic Church in the 1970s, there was precious little informality. Impeccable behaviour was expected, and, generally, delivered. Any deviation, signs of boredom or outright naughtiness was NOT good and you would be left in little doubt that you had let the side down. But the youngest bridesmaid was 3. Good luck folks! As I said earlier, this is from the perspective of a kid. I was both mortified by what happened, as the Bridesmaid Etiquette had gotten massively trampled upon, and yet couldn’t help thinking ‘well, what did you expect…’

I only recall what happened in the church. There was probably more. Perhaps I have just blocked it out with my own PBSD. The 3 year old cousin, we will call her D, was really not keen on the job. She was cross that she had different footwear to the rest of us. Apparently ballet shoes were not available in her size so she got snazzy new white proper shoes. Fair enough, she wanted to be like everyone else. But you know, deal with it, right? We are all standing here getting net rash, but doin’ it for Auntie C.

There was some kerfuffle as we prepared to parade down the aisle. D could not understand why she had to go last in the cloud of lemony scratchy flowery bridesmaids. She wanted to be front and centre. Some rank was pulled. Maybe some hair too? I don’t know. But she ended up back at the back, and grouchy as hell.

So, we have made it safely down the aisle, despite being hamstrung by the slightly blinkering effect of the stiff bonnets and blooms and the chafing of the double fisherman‘s knot they had been secured with. The couple are at the altar, bridesmaids assembled in arrow formation 2,2,1 – oldest to youngest – behind. Some solemn words are being said by the priest, and four of us are doing our best to look angelic and attentive. The fifth, Cousin D, has had enough. She stomps to the front and started fussing at the bride’s gown. The Chief Wrangler lived up to her title and executed a stealth manoeuvre. Order was restored, briefly. Then cousin D changed tactics, and started counting the holes in my sister’s broderie anglaise dress. Loudly. And poking each hole, vigorously. Enough to bruise. So the congregation is treated to “ONE! (ouch) TWO! (aargh) FIVE! (oooh) EIGHT!” (whoa).  ‘Bless the person that taught her numbers‘, I am sure the adults were thinking. Then, cousin D again, with slightly less confidence “NINE! NINE! NINE! TWO-TY TEN!” Okaaaay. Some querulous looks between the bridesmaids, hushed instructions and a snatch and bundle operation. Back to positions, pretend that everything is fine. Nobody noticed, right?

A bit more of the wedding service went on. Don’t ask me what. Cousin D decided it was a dull affair. She wandered in the direction of our grandmother (mother of the bride) and threw her bridesmaid’s posy at her, and hollered “here, you hold this, I have had E-NOUGH”. Yeah, the work of a 3 year old is truly hard… She spent the rest of the service pinioned to the front pew, humming as only a toddler can. Namely a selection of nursery rhymes mashed up with a smattering of her own interesting compositions, with gusto.

The photos were a bit hit and miss. Some had four bridesmaids, some five. I expect remonstrations and toilet breaks were the cause. Then the party, afterwards, in my grandparents’ house. A real meeting of an older generation and my aunt’s super cool friends, who were so lovely to the bonneted scratchy ones, now blessedly bonnetless and craving the calm of calamine lotion.

Anyway, Auntie C is married again. I know she will be happy, and had a lovely day, but she didn’t ask us to bridesmaid this time…..

wedding-heart

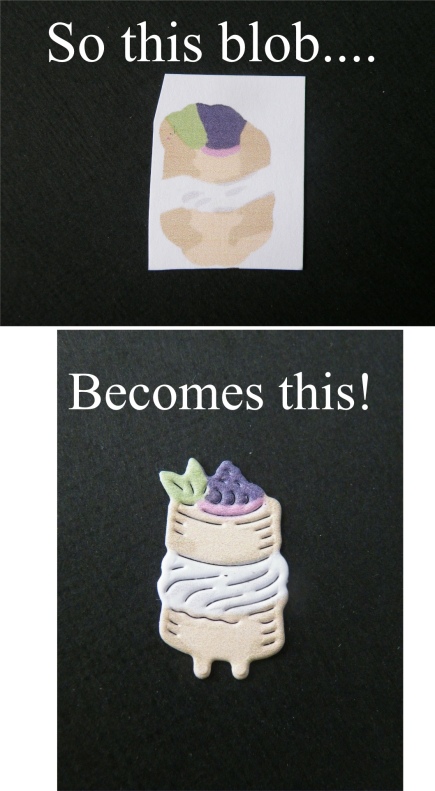
Supplies list – I used so many individual items! If anyone wants to know what something is, or how I made these, drop a line in a comment and I will get back to you.

‘Tis the season to be blingy

Put your shades on, people….

Now in essence this is a quick card. In practice, far from it. We went through more reinventions and incarnations than Madonna. I think the problem was that I started with the premise that I HAD to use a gilded reindeer but could not find my large antlered beast anywhere, so used a much smaller die instead. I tried stamps for the sentiment because they were to scale, but the embossing powders could not compete with the blingy reindeer. I only have a few Christmas greeting dies and they are too big for this so just overwhelmed the poor little chap. Eventually I decided to cut one down, just to the word ‘Christmas’ which was fine. Then all the positioning went out of whack. Should there be snow up at the top, or snow down at the bottom? Ditto for the greeting. Everything I did fought against something else!

Eventually I decided on putting all the action into the middle of the black layer to give a border of peace and tranquility top and bottom. I think with such a full-on bling thing it was possibly a wise move! This means my brave little Blitzen is now dodging a gold meteor shower, just to bring some Christmas cheer. I hope we are all suitably grateful for his efforts….

blingy-reindeer

To make this card I cut a card blank in gold, then a smaller layer in black. I used the Avery Elle Falling Snow die to create my stardust/meteor shower in the black card and a cut a gold Tattered Lace Happy Christmas, minus the Happy. The recipient will have to take it as given. The reindeer is a Marianne die I have had for years. He doesn’t seem to have a name, just a serial number LR0179. Seems kind of unfriendly, hence the renaming to Blitzen.

blingy-reindeer-detail

Blitzen was a lot easier to gild than the tree decoration from last week. I dug out some double sided sticky paper that is meant to be used with detail dies to save you trying to get adhesive neatly on the back, but of course if you use it in reverse the front of your die cut becomes sticky instead, ready for gilding. So no gluey mitts this time.

I have to confess that the reindeer is raised on 1mm 3D foam, but otherwise the card is again totally flat and will easily meet the lowest postage charge criteria. Lets hope he makes it through the storm!


3D Thursday: home for the holidays?

Week four of my 3D Thursdays. I wasn’t sure I would manage to keep it up, but I have stuck with it (sorry!) and am having fun making little glittery things. Well, today it is one very little, very glittery thing.

I have used a Tattered Lace Shop die (bought last year) to make a Christmassy something. It could be purely decorative, or another Advent calendar piece, or even an alternative Christmas card or tree decoration.

Firstly I printed out some music score from the Hearts and Roses Christmas digikit using Serif CraftArtist. With uncharacteristic foresight I actually thought about where to position the die, so I have musical notes in the right places, as opposed to featuring the gap between the staves. Hurrah!

Next to crease and glue the shop (hereafter known as the ‘house’) together. I inked the house corners in silver to define them a bit more. For the roof I wanted a different colour and texture so opted for some silver glitter cardstock, cut to size, the edges trimmed with decorative scissors and then stuck over the existing roof. Like double glazing. Ignore the fact the windows are open to the elements. This is a house for tiny yetis. I also used the same scissors to cut slivers of glitter card for the base.

holiday-house-1

The wreath is highly technical. It is made by twisting a silver pipe-cleaner around a pen to form the circle, dolloping on some tacky glue in a very heavy-handed way and then dunking in a tub of glitter a few times so it gets a bit clumpy looking, like wet snow. Mission accomplished!

holiday-house-4

The finishing touches are a string of sticky pearls to gussy up the gable end and a banner greeting raised up on a double layer of 3D pads. Add one twinkly battery tea light and ta-dah!

If you fancy having a go you don’t need a die to do this. There are plenty of free templates for houses available. You might even already have a cookbook with a gingerbread house you could use. If anyone does make one I’d love to see!

Supplies: Tattered Lace Essentials Shop die (retired); Clearly Besotted Mini Basic Banners stamps (Christmas selection) and die; Brilliance Starlite Silver pearlescent ink; pearls from The Ribbon Room


3D Thursday: Retail Therapy

Welcome to 3D Thursday!

Some people may remember a little while ago I was asking how other bloggers plan their posts, do they have a structure, do they schedule ahead and so on. Whilst reading the responses (and thanks again to everyone who took time to comment) I began to get a few ideas in my head, and one thing I realised was that I wasn’t posting anything much other than cards, yet I love making 3D objects too. Maybe this was worth pursuing?

I decided I would try a regular 3D-something post each week and see how I go. Hopefully I will at least make it to week 3 anyway. The irony of failure to do this would not go unnoticed.

Not wishing to raise anyone’s expectations for the future, not everything will be quite on this scale, but on week one I thought I may as well go all in.

tl-retail-therapy-patisserie-2

This is a Tattered Lace Retail Therapy shop. Cake shop, obviously! Well they say if you want to write about something, start with what you know…. And this will be something of a novel because I thought I would write a review, of a sort. Non-crafters, feel free to look at the pretty pictures only! Well, anyone can really….

tl-retail-therapy-patisserie-detail

This was my first attempt. I bought the bundle which gives you dies for the shop exterior, three different interiors and a CD-ROM with images to match the dies, backgrounds etc. There are absolutely tons of dies so lots of scope to change the look of your finished project every time, should you wish. The detail for the shop exterior is amazing – all sorts of different architectural features, hanging baskets etc to play with.

I started off by looking at the CD-ROM, which is a Click, Print, Go! product. This should mean you just open, browse through the selections and then print your choices. You do not want to resize the images as they are made to fit the dies. However, the running programme does not work with my Windows 7. I had contacted Tattered Lace about this in the past and to be honest I was a bit let down by their response. I felt that if they knew it was a problem then they should mention it, or fix it. Maybe I just got them on a bad day, but whilst waiting for them to get back to me I found my own solution. I copy into Serif CraftArtist, and although the image sheet comes in too small I just resize it to exactly A4 and it works fine. If you have had the same experience and have got CraftArtist then this may work for you too. I was hoping the issue might have been fixed by now, but I still have to go through the procedure with this new CD-ROM. It works, but it takes longer and means I have to wade through lots of file folders instead of whizzing through screen images. Because of this I didn’t go through everything on the disk, just found some colours I liked and made a start.

I chose a bright blue and soft green combination, and cut the shop shell first. Be aware that if you have colour on only one side of your card, because you will be folding two parts (the canopy and the support at the base) back on themselves, you will end up with white showing, as you can see on the base in this shot here.

tl-retail-therapy-white-base

For the canopy you are likely to be covering it with lovely scallop shapes anyway, and for the base I just covered it with some more of the blue. It’s not a problem, just don’t think you have done something wrong! Of course though you could use some card coloured on both sides. The construction is pretty obvious, and included on the packaging anyway.


Now for the shop window! The images look weird when you print them, some almost unrecognisable. It’s a bit like a party game…hmmn…what might that be…but don’t worry, they are actually pretty genius. Helpfully all the dies are labelled, but I did have a few head scratching moments trying to match them to the printout. Once you have that sussed, just centre the die on the image and cut it out. It is amazing how an out of focus blob suddenly turns into a scrummy cake! I was majorly impressed with this. There may have been a dance…

tl-blog-to-sponge

You also have shelves, cake stands, a little menu board, a tea service, loads. All the images have a couple of little notches that slot into slits on the shelves to help them stand upright. Nice!

I thought it would be clever to attach the base at the right hand side only to a piece of card big enough to then fold in half at the left hand side once all the detail had been added in, thus making my base card.  Like this…

tl-retail-therapy-card-attached

When will I learn? NEVER try to be clever. The lovely stiff card I was using simply did not want to fold close enough to the card edge for my liking, giving me a semi-spotted small rim down the spine. So I chopped it off instead. Probably a much better idea to stick a very slightly smaller (by a couple of millimetres) card to the back afterwards, or just provide a pretty die cut shape (with double-sided tape to affix it) that the giver can write on.

There are some helpful instructions on the Tattered Lace website, in the Downloads section. I didn’t look at these until after I had finished of course. I should have checked them out as it has cleared up the mystery of the cake stand construction for me!

I haven’t had time to make a second one yet. They do take a while, but if you like construction projects it is, honestly, great fun, and the end result is pretty darn fab. I know plenty of people who would love to receive one of these, and the images won’t just be restricted to shop fronts either, as the die cuts can easily be used for other projects. Would I recommend the product? Absolutely, definitely, yes. Do I want all the other shops they are teasing with? Absolutely, definitely, yes! Will I leave you with one more picture? Why not!

tl-retail-therapy-patisserie-detail-wonky

Supplies: Tattered Lace Retail Therapy Store and Retail Therapy Patisserie dies and CD-ROM; strong white card, glue and red liner tape


Quite..erm..pinteresting?

Whilst I was away from Bloggyland recently, my most ‘successful’ personal creation hit 1000+ pins on Pinterest. I have already posted about this before when it hit 500+ pins and I was cock-a-hoop pretty pleased, and this post is not just another excuse to do that, although I see no reason to be falsely coy or say ‘oh, that old thing?’ Now though, they stop counting, and it just has 1k pins beside it, so, fickle to the end, I have rather lost interest! Maybe, if it ever gets to 2k, I might get excited again. I might also be in a residential home eating pureed vegetables and telling inappropriate jokes, who knows?

This post is more about what does, or does not, get re-pinned. Again, I did mention this previously: I am fully aware that the card is not a work of genius, and it has been made with a very popular and relatively new range of stamps which undoubtedly helped. It is nice, I think, but I am not deluded. It is not ‘amazing’. It is though, perhaps, something which, as a beginner with an interest in card making, you could look at and think ‘yes, I can do that with no problem’. And to be honest I think this of most of the cards I make. I know I generally ‘execute well’, and my work is neat and well finished, but not exceptional. I am ok with that (no choice really!).

But what interests me is: how do we make our pinning choices? Why do we re-pin? Because something is achievable, or aspirational, or just because we may as well save it ‘because we can‘? I have boards and pins for hundreds of things I am pretty sure I may never make, or buy, or visit…. I pin cards that I could never hope to produce the like of if I lived to be 150. Is that just me?

I have a few cards now that have a few hundred pins, but it has taken a long time. I’m sure for other people this happens way, way quicker. For me, I thought to use it as a gauge of what people may or may not like. But here is where I am stuck, and going back to the “what appeals“ question. It seemed to me that Pinterest would be a good way to check this.

Here is my example of the dilemma. Months ago I pinned two cards on the same day, which were, broadly, the same card but upside down and downside up. One has had WAY more pins than the other: 427 vs 110. So is one visually much more pleasing?  If so, is it obvious to everyone except me, and is there a reason? Feel free to say (nicely!) – I’d like to know! I made them so I cannot tell for sure; I do have a slight preference, but it is only slight.

Or, is it just luck? Of all the pins in all the world, someone comes across one of yours, but only one…

I am thinking about doing an experiment. Two cards, in the ‘same but different’ category, probably pretty much the same layout as these. Then I will pin them and wait (for months, I know) to see if none, one or both get re-pinned. I would have made them to include in this post but any creativity I had is hiding behind the sofa this week and refusing to come out.

If anyone else fancies trying the same experiment, let me know and I’ll re-pin yours. Oh, and to be fully scientific (because I have been rigorous so far, right??!) there should probably be a ‘control’ as well, so something entirely different but pinned on the same day. Pehaps even make it a howler, just to see!

If you should choose to accept the mission, good luck, and get sticking! This post will NOT self destruct in 5 seconds…


Quick, quick, slow…

One super-quick card and one which should have been quick, but….

I am running a bit low on general birthday cards, so wanted to rustle up a few quick ones. And, if I can fool people into thinking they took ages, so much the better. I know you can’t fool a crafter, but most people I know would struggle to define ‘double sided tape’ and would think a bone folder would most likely be an implement of torture or medieval medicine, probably to be used alongside some leeches. So, with a bit of smoke and mirrors I might get away with it.

Super-quick one first. This is Anna Griffin cardstock, already cut to size. I matched the cream colour in the pattern as best I could from my stash and the blue from my inks. I used a Tattered Lace Charisma Frames 1 die, which I ran through an Anna Griffin embossing folder, stamped the sentiment onto the same cream card and cut out with a Spellbinders oval. Some 3d foam and a ribbon flourish to finish. Done in minutes.

AG cream and blue

Now for the one I had to rugby tackle into submission. The only reason it was a bit trickier was getting a good cut on the die. This is a large floral panel from Tattered Lace (I have lost the packaging so cannot tell you the name). Using my Big Shot and with all the tabs on the Universal Platform closed, it felt just too tight to get it through the machine safely. But running it through with one tab open was no good either as it just didn’t cut at all. I ended up with a sort of princess and the pea pile of card underneath the die and cutting plates to act like a booster seat. I had to run it through the machine many, many times, shim certain spots and even then, when it looked ok I realised it hadn’t cut everywhere so ended up attacking it with the craft knife to finish it off. As in, complete it, not hack it to bits in a fit of pique. Although it did cross my mind.

Once cut to satisfaction, it is just a case of trimming round where the flowers join to get the line you want at the bottom. Leave the rest intact until you stick it on to your base card, overlapping the sides and top. Then trim. The stamped greeting is Anna Griffin again, and the die is the same set of Charisma Frames used for the first card. I chose an off-white shade for the card base as pure white looked a little too harsh, and because I have an enormous roll of ivory ribbon!

TL floral panel silverTL floral panel silver detail

I see duck feet in the petals of the flower on the right, no?


In the wee small hours

You know that maelstrom of thought that goes through your head when you can’t sleep? Here’s a smattering of my wee small hours lunacy earlier today:

 “Oh, no, brain is pinging thoughts around in my head like a pinball machine again…

Why is it called a chain of thought anyway?

Hmm, chains…who said ’man is born free and everywhere he is in chains’? French chap…Descartes…no….Rousseau…I think…?

Was there a Mrs Rousseau? And if so, did she have a trousseau?

What then was Descartes famous for….oh yes, ‘I think therefore I am’….

Remember that book of graffiti you had as a kid?  With the joke version ‘I’m pink, therefore I’m Spam’?

Well that joke won’t work nowadays will it, because Spam doesn’t mean processed luncheon meat to most people any more….

If I was writing this down I could put LOL at the end of that sentence…

I don’t like the look of LOL.. do I like ‘The Look of Love’? Not sure. Who recorded it anyway?? Oh yes, Dusty Whatshername…who calls a kid Dusty? Was that her real name?

Back to LOL. it does come in handy…I use it, but I don’t like looking at it…probably because it is in shouty capitals…

But what is the present participle? When I use LOL, I can’t be ‘lolling’, can I? Can I? Am I?”

Oh sleep, where art though??

Here’s a card.

TL Ornate Lattice cut out 2

This is made using Tattered Lace Ornate Lattice. It is a two-part set that can cut into your card, and then has a separate outer die if you want to remove it completely. I haven’t used dies quite in this way before, but purely by luck really I worked out that it was easier to just cut into a piece of card about two centimetres bigger than the detail die itself, then snip out the section you want at the top and bottom, but leave the sides with their border intact. This border keeps it stable for sticking down. Your base card needs therefore to be smaller than your selected section. Stick it onto your card, then trim off your ‘stabilisers’ at the sides. I realise it might have been helpful if I had taken pictures as I went along (!!), but if anyone wants to give it a go and needs me to explain myself better, just put it in a comment and I’ll do a step-by-step.
It is relatively quick to do and quite effective. I’m going to try it out in lots of different colour combinations and with similar dies.

Still more or less mojo-less

Mojo is now behaving like the sun in Britain this week. Shines weakly for about two minutes then disappears behind angry clouds for ages. So this has been a stop-start project today. I bought this Sizzix die a long time ago for a bargain price but it is a tricky one to use, which I guess is why it was on sale! It cuts all the edges, as opposed to the other ones you can get where you decide whether to leave it in your card or cut it out. So you can’t just use it as a front for a card easily. Normally then, you would place your top cutting edge above your card fold a little, so the cutting edge has nothing to cut. But with this one many of the internal cutting lines are really close (i.e. 2mm!) to the outer line, and the nature of the pattern means this won’t work here either. Finally I decided to try just clearing the card fold with the outer cutting line but placing the fold within the 2mm gap to the inner cutting line and cut through front and back. Fingers crossed!

Literally 20+ times thought two different die cutting machines (one electric, one manual) and it looked like the cut was as good as it was going to get. I should have chosen thinner cardstock, but bearing in mind the amount of card that was going to be cut away I thought something substantial might be a smart move. It was good for the end product but after another 20 minutes snipping carefully away with scissors where it didn’t quite cut through cleanly my sanity had taken a bashing.

I decided to use acetate for a bit of extra support. With the card base being so intricate I plumped for a really simple greeting, ribbon and nothing else. Might go back and add a pearl or two though, not sure.

see thru Love

I like the look of these cards but not the effort involved!

Remember yesterday?

Today I set about making the card I intended to make yesterday, before I had rudely interrupted myself and gone ‘off piste’. Or ‘off poste’, maybe?! So if you saw yesterday’s effort, you know it is Altenew roses, pink, vellum and silver. I can’t surprise you. Except that the silver was meant to be for leaves, not the base card. I also had in mind to use wood grain embossed effect again, make some kind of tag and hope for a happy outcome.

Then I got an attack of that well-known crafting complain the Dilemmas. Emboss both the tag and background or just one, and if so, which? I die cut lots of silver leaf sprigs. Use lots? One? None, in the end. I was going to have two different strips of texture and pattern across the bottom of the tag and ended up with one. I was going to heat emboss all the edges of the tag and then decided to leave the bottom plain. Not sure why, but I am glad I did.

Finally I get to the assembly stage and the Dilemmas still have a hold of me. I cannot decide on the base card. White wood grain or linen effect silver?

I’m still not sure which I like better. Anyone got a preference? Also, TWO cards! Just thought I’d mention it….