Ombre stamping

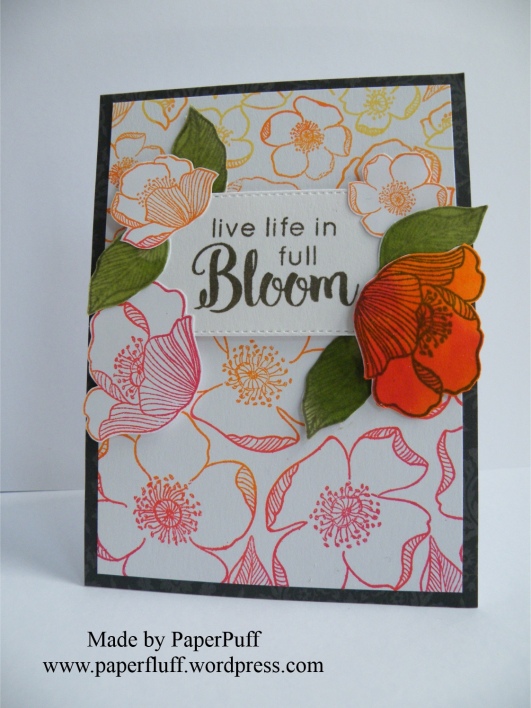
Just a post to share a card. No ranting today! This set of stamps is called ‘Adore You’. The feeling is mutual. There are so many differently sized flowers and leaves, and they are kind of retro, I think.

Last night I had an inkling to make a sort of ombre stamped effect, and also to have the flowers roughly decreasing in size as I stamped from bottom to top of the card. I found it easier to work this way to make sure I had the space to use the larger blooms. Knowing me, if I had stamped from top to bottom I would have run out of card before I got to the feature flowers. A bit like telling a joke but starting at the punch line…

Rather than using lots of small ink pads, which would have been a faff, I had a ‘I think I may have something in the back’ kind of moment. Like in an old shoe shop, not like a Brutus and Caesar showdown. And guess what? I found a very ancient Kaleidacolor Rainbow ink pad in shades from orange through to red, which was exactly what I wanted. And even though it is at least 14 years old, it still is totally fine and juicy with ink. Now that is a good product!! The various ink pads are separate when closed (to stop them mixing or contaminating each other) but you can slide them together to make one continuous ombre ink pad. Genius!

I used a dark grey mat as a contrast for all the red and orange. And although I know nobody in the industry reads this, could I still put out a plea for a decent multipack of grey card? Pretty please? It is so difficult to find, especially a really nice charcoal. Also, patterned, and self-patterned greys too, please, whilst you are not here anyway! If any other crafters know where I can get some please let me know in the comments?!

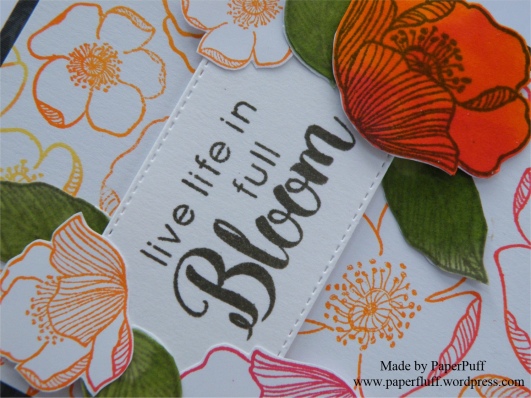
I used Altenew Lava Rock ink to stamp the sentiment (from Dahlia Blossoms stamp set) and a stitched rectangle popped up on 3D foam. Now I could well have finished here. It was a nice enough card, but I decided to take the sentiment rather literally. So, a bit more stamping and fussy cutting and I had some extra blooms. Then I decided I wanted one full-on coloured flower, but once that was on there I needed some balance, hence the green leaves. Initially they were just stamped outlines in pale green, but something jarred so they became full-on leafy. Luckily bed time came along to stop me from further fiddling!

adore you ombreadore you ombre detail

Supplies: Altenew Adore you and Dahlia Blossoms stamp sets; Kaleidacolor Rainbow ink pad in Desert Heat; Altenew inks in Lava Rock, Frayed Leaf and Forest Glades; The Works stitched rectangle dies


Countdown to Easter: bunnies, Martha Stewart and Chopin

No, this is not one of those ‘if you could invite anyone from history to a dinner party’ conversations. Last week, on a whim, I bought a bag of polystyrene bunnies from The Works. At £1 for six little hoppers (well three large, three small, actually) it seemed rude not to.

I have a thing about 3D objects covered in glitter. It has to be good glitter though, so the colour is important – not ‘unwell urine yellow’ masquerading as gold. Years ago I bought a set of Martha Stewart glitters. Actually I liked them so much I then bought a second set in case they were discontinued or there was a worldwide glitter shortage. Luckily glitter hoarding is not a crime. I still have two practically full packs because a little goes a long way, but they are the BEST colours so I regret nothing. No wait, I regret shoulder pads…

I also have a thing for book pages or sheet music used in decorative items. So, a perfect opportunity to indulge both. It is healthier than chocolate. Amazingly I have never been tempted to lick glitter. Or sheet music.

So, to bunny number one. I decided to cover him in torn strips of the sheet music. I actually don’t think I have ever done this before with a complicated shape, but I had 6 bunnies to play with and plenty more in the shop if it went wrong. I mixed pva glue and water in approximately the usual 2:1 ratio and added some mica powder to colour it. I partly spread glue thinly on the bunny, partly doused the sheet music strips and just covered him as best I could, working the paper in to the creases with a firm brush. For sections like the side of his face and ears I found it easier to then tear another piece approximately the right shape and glue it over the top. He was set aside to dry a bit, then given another coat of the pva/mica for an extra glossy finish.

Bunny number two was glitter time! Again I have never covered a polystyrene shape like this before. I actually used the same tub of pva and mica because I had mixed up far too much. I thought the colour might taint the glitter a bit but there was no problem. The only difficulty was choosing what glitter to use, but eventually I plumped for Kunzite, a lovely dusty pink. If you have never covered shapes like this, just use a really, really thin layer of glue. You can always touch up any bald patches afterwards but if you put too much on you end up with dripping or sliding glue, and your bunny will have wrinkles prematurely. Might end up looking more like an Easter rhino or one of those pop-up ads for miracle face creams.

Now, I kind of wanted to add a bit more decoration to my bunny couple, but I am also of a ‘less is more’ tendency, so minimal accessorising was preferred. I made a tiny little crown/tiara thingie for Rosa, which of course elevated her status to Princess, and in the end just a simple bow for Mr Noteworthy. A woman should never be upstaged by her consort.

noteworthy and rosa


I blame Doris Day. And Julia Roberts.

Little gift bags. Don’t you love them? I do, slightly to the point of obsession, in truth. I think it is due to all those movies where you see someone out on a shopping spree. We watch a montage bit, with nods and smiles to the shop staff, an impromptu catwalk show for one and some uplifting ‘what good fun this is’ music. Then the immaculately dressed star appears tripping daintily along with an unwieldy haul of beautifully presented packages, boxes and bags.

Real life isn’t like that. Doris and Julia didn’t shop in the rain, having forgotten their umbrella, thus ending up with lank hair plastered to their heads and a whiff of damp wool or anorak about them. Or with a streaming cold that made their nose go red and render them nearly incomprehensible to the assistant. They didn’t have to lug badly made plastic carrier bags that, once stuffed with your practical purchases, weigh a ton and cut into your hands. Only you didn’t realised this was happening because your hands are so darn cold (your gloves are with your umbrella, at home, in the warm) you have lost most of the feeling anyway. Doris and Julia didn’t have to choose sensible shoes over kitten or stiletto heels because the hours of tramping the aisles or pounding the pavement would make their pretty ankles swell like swiss rolls. Theirs was a very different shopping experience, one I am yet to emulate.

Aaaaanyway, back to the reason for the rambling. I have made a simple card and gift bag using the same stamp. I have had this La Blanche stamp for years and love the fine detail of it, but am not much of a one for the traditional sunflower colours so decided to go for grey and black.

sunflower-bag-and-card-1

My fabulous WRMK Gift Bag Punch Board was used to make the bag from plain white card, which I punched and scored to see where the panels would fall, but did not assemble. This meant I knew where I needed to position the stamp to get it bang on the front. I also die cut ovals to make the handles, then a larger oval frame from black to reinforce them. And to make the bag fancier! Then I went mad and blinged up a small wooden peg with holographic gold tape from The Works. Doris and Julia don’t get all the fun!

To make the card a bit more interesting I just cut a section of the image from the bottom and layered onto black mats. An old trick but it works a treat! The oval shape for the stamped sentiment is the one I cut from the gift bag, to tie everything in, hopefully nicely. And a few pale orange Nuvo Drops for a tiny splash of colour.


3D Thursday: Chirps, cheap as chips!

This is a quick project as I have not had time to make much this week. I did though have time to pay a visit to The Works, a shop I have only relatively recently discovered has a selection of craft items, often at really good prices. Amongst other things, I bought a birdcage die. I know birdcage imagery has been around for a long time and is probably out of fashion again now, but I have always liked ornate wire cages: whether fashionable or not, I just think they are very pretty. And at only £3 for a die which is nearly 10cm (4”) tall, well it would have been rude not to make a purchase. Of course I overdid the politeness and bought a lot more besides but we will gloss over that.

So, today I needed to make something for 3D Thursday. I had a few ideas in my head but all were quite time-consuming, then I thought about trying to 3D the birdcage. It is symmetrical apart from the bird on the top (I am glad he is sitting on the cage and not in it!) so in theory it should work. And guess what? This time the theory was right!

birdcage-lumiere

I cut the image four times for each cage from decently thick card, one lot in white and the other in silver, then folded back the small curlicues at the sides on the lower sections. I then glued these together to form the basic ‘square’ shape. Next came some semi-complicated and totally unnecessary faffing about with the tops of the cages: I cut the bird off the back one as it pointed in the opposite direction and looked odd in a photo. I also cut the bird and curlicues off the two side pieces, then pinched and glued them together to make a kind of dome. In practice this makes them look a bit complicated in the photo, although they do make interesting shadows. What I really should have done for an easy life is just cut the tapering top section off all but the front piece. Never mind, I know now!

Once this was done I die cut the bird only from silver glitter card and stuck it over the plain bird. He even has a little wing you can fold out. Nice to know he is capable of escape should he wish. Also a pearl for an eye as we don’t want him crashing into the furniture. I could have gone on and decorated the cage more, but I had no time.

To make them each into a lumiere I rustled up a quick sleeve for the battery tea light from white vellum, just to diffuse the light a bit. They could though also be used for tree decorations. For a quick project I am pretty happy with the results!


Christmas card productivity increase of 200%!!

Sound impressive, right? Statistics can be misleading. Yes, I have increased my productivity by 200%. Maybe it might be 300%, I can never work these things out. I tried googling it and came out the other side only more confused and desperately in need of refreshment. If only I had a blogger friend who loves maths…(you know who you are, feel free to step in any time!). But the point is, I had ONE Christmas card, and now I have three. So the stats are impressive, but the basic numbers are rubbish!!

lf-scripty-pair

Anyway, these simple little cards were really fun to make. The two-stamp process for the fairy lights looked like it had major potential for disaster, especially as they are really, really tiny, but it works like a dream. Not one single one went wrong. Hurrah! Then the stamps and dies worked amazingly well together too: lining up the die over the fine line word stamp was really simple and it felt like some thought had gone into making this easy for us to do. Plus, I love them!! Can’t wait to try these out a bit more.

lf-scripty-whitelf-scripty-red

As usual I tried out baker’s twine, ribbon, even a jingle bell or two as a bit of extra embellishment, but rejected them all in favour of total minimalism. I got these little easels at The Works. How cool are they?! And they really are tiny – the cards are under 10cm square.

Supplies: Lawn Fawn Winter Big Scripty Words stamps and dies; Altenew inks: Teresa Collins Modern Stripe embossing folder; cards from my stash.