3D Thursday: salty baubles. Really.

Thursdays seem to be coming around quick these days. Today I have another home made Christmas bauble/ornament to share. I have a bought a lot of fancy tree decorations in my time, and one of the favourites is the inspiration for this project.

Again I have used the kids toy balls that my sister covered with papier mache. This time I coated it with Brilliance Cosmic Copper pearlescent ink. The ink was still tacky after two days, which is odd, because it should dry on non-porous surfaces. As the next step was to paint on diluted pva I was worried it might slide off with the glue, but it was ok. So, I used approximately 2 parts glue to one part water and, resting the ornament in a votive candle holder (like an oversized boiled egg) I painted the glue on from the top to about 2/3rds of the way down. I had already decided to go for a rough edge and leave some of the shiny copper showing at the bottom. Partly a design feature, mostly practicality!

Then, the really quite astonishing bit – I threw Epsom salts over it! Honest! And look, you get this rather nice icy effect where they stick to the glue. Proper chuffed, I am. Also, clearly, becoming Yoda again.

salted-bauble-1

I then made a couple of holly leaves from sheet music, distress inks and good old Smoky Quartz glitter, my ‘signature’ glitter shade this year! I bought a book of sheet music for craft purposes years ago. I think the sales assistant was confused by my reply to the ‘can I help you?’ question. ‘Oh yes, please. I need a big book with music that has LOTS of notes in it’. I expect the word ‘philistine’ popped into their head. Or maybe just ‘pleb’.

I tied the holly leaves on with garden twine and job done.

You can see the ‘blank’ ornament in the pictures above. Also, I finally have the tree up! No decorations yet, just lights. And one salty bauble, of course!

If you try the Epsom salts lobbing technique yourself, my top tip would be to stand the object to be a-salted (sorry) in a container which has quite high sides because the crystals ping around all over the place. I used a large cooking saucepan in the end, which did the trick nicely.

Hope everyone is steaming ahead with Christmas projects and chores!


3D Thursday: It’s Shakespeare, Jim, but not as we know it…

Sorry Trekkies….

Last year on Pinterest I saw lots of Christmas ornaments with a honeycomb paper look. Now, I can just about remember from childhood many Christmas ornaments being made from honeycomb paper. They would be something like a bell, or a tree, probably about a foot long. They would be multicoloured, and be able to open for the festivities and fold closed again to store for next year. The honeycomb effect would be quite elaborate too. The ornaments I saw on Pinterest were handmade, and therefore much less elaborate, but really appealed. Also many were made with book pages. I wanted to try it last year but never had the time. I know some people feel that books should not be cut up, or cut into, but I feel differently. I love books. I love to read them, flick through them, even pile up old interesting looking ones simply for decoration. But I also just like the look of the text and the feel of the pages, so using them as a craft material is fine, for me. Otherwise these books are sitting alone and unloved in a charity or second-hand shop somewhere. Where is the glory or dignity in that? If you feel differently, it’s ok, just look away now and come back another day maybe?!

Still here? OK. So, yesterday I watched various YouTube clips to see how to make the honeycomb paper effect. Then armed with some knowledge I waded on in. The method I came up with was a bit of a mixture of the videos I watched. Isn’t that often the way? If anyone wants to know specifics just let me know in a comment and I will put something together, but really if you fancy having a go there are plenty of tutorials already available.

I used an old book of Shakespeare plays. Probably just a twisted amusement at making something which vaguely resembles an Elizabethan ruff from The Bard’s works. Or shall I pretend it is in homage?! But for the record I don’t actually see Shakespeare’s visage in honeycomb paper, or on my toast, like some people do…

As I said, I won’t go into masses of detail, but basically you cut your shapes, fold them in half and then stick them together one on top of the other, but alternating the sticking points. Really, seriously, I can try to explain this more but other people have already done it way better so I won’t. YouTube is great for this!

Once you have your basic shape done, again you have choices for the hanging loop and decoration at the bottom. Or at least you would have choices if you were a crafter with a selection of beads to hand. I am not, so ended up using a snowflake charm that was free with a magazine about a million years ago.

I wanted more bling. I wanted those pages GLITTERED! A rifle through my glitter stash and I plumped for Smoky Quartz by Martha Stewart. It is an old-fashioned kind of colour, exactly what I had in mind. So late last night I was sitting painting diluted pva glue onto the edges of the pages and then liberally sprinkling with glitter. Some pages are a bit more glittery than I would like, but too late now. Next time I will do the job in better light. I also decided I loved the glitter so much that I added it to some simple die cut holly leaves too and stuck these at the top of the ornament.

book-page-ornament-1


What I learned from this first one is that it is worth taking some time to work out the position of your fixing points. This ornament could have looked better with a different choice I think, but now I know.

Also, glue dots seemed to be the weapon of choice for a lot of the YouTube-ers, but I gave up on them pretty quick. You simply cannot easily see where you are putting them because of the carrier paper. I just used a sticky tape runner and it worked fine.

I know you would have to be very careful about where you placed a decoration like this but I do find them interesting to look at. Again this is another project that you absolutely could replicate without a die or die cutter. Just draw half a simple ornament shape, cut it out, draw around it on your already folded book pages and you are good to go.


The die I used was the largest from Spellbinders 2010 Heirloom Ornaments


3D Thursday: Gilty pleasures

I have been playing with the Christmas ornament ‘blanks’ my sister made again. I previously posted a WIP, which I think I may have now ruined. More of that in another post perhaps. However, this is bauble number two. Just to explain I will be freely switching from using ‘bauble’ to ‘ornament’ and back again, partially so I make sense to the majority of those I know read my blog. Also, whilst a big fan of the English language and a stalwart supporter of using a wide vocabulary, I HATE the word bauble. It sounds vaguely anatomical, like an appendage or a minor organ, maybe something that is prone to swelling and bursting, akin to the appendix. Got an attack of bauble bursitis. Ouch!

Anyway, enough of the inside of my head for now. Here we have ornament number two. I started off by covering it with IndigoBlu gilding flakes in Winter Dawn. Can I say that this is not an endeavour which should be undertaken lightly. There was A LOT of mess, and most of it was stuck to me. I tried to keep one hand ‘clean’ and one hand sticky but it was just not possible. By the time the whole bauble was covered, at least 40% of the surface of my hands was too. Then the cat came along and somehow got a large gilding flake on his nose. Some comedy hissing and ‘pffing’ ensued. Him, not me. Obviously I did not want him to ingest it. I was pretty sure the manufacturers would not have thought it necessary to include any details about whether it was safe for cats to eat. In all fairness, they should not be expected to! So I attempted a pre-emptive snatch and grab (still with my heavily gilded fingers), which of course Riley (cat in residence) eluded. But I couldn’t assume the large flake was not stuck to him – the state of my own paws were evidence this was a definite possibility. So, the chase was on.

Anyone own a cat? Anyone know that a lot of them don’t like tin foil (maybe called kitchen or baking foil too)? Yep, Riley is one of them. I always thought it was the noise the foil made but, seeing me approaching with hands that have suddenly become reflective from all the silver gilding flakes and glue (believe me, it is good glue ‘cos everything stuck fast), well he was either genuinely freaked or just decided it was a good opportunity for a game. After haring up and down stairs chasing him a few times I was satisfied that he was a gilding flake-free zone. I, however, had added a couple of interesting hand prints to the banisters. Oh joy, I thought.

Back to the bauble. The reason I was all glued up was mostly because I was trying to cover a round object; so, holding it, applying the glue to an area and then turning it meant I just. Got. Sticky. I could have done smaller areas at a time, but I was rushing; and maybe latex gloves might have been sensible, but hey, we learn by our mistakes. It was user error, not the fault of the product. You can’t blame a good glue for being good! Once the ornament was all flaked up I just went in with the sponge and gave it a buffing to remove the loose or partially stuck flakes. This is when you can really see the results of your efforts. So, the orb was now covered and the next stage had been inspired by my thoughts on the handprint on the banisters, which in a way was serendipity, or payback, whichever way your mind works. I had an Anna Griffin ’joy’ die which I dug out, cut from gold card and then covered in Martha Stewart Copper glitter, to match the hanging loop. If anyone is wondering ‘why gold card?‘, the answer is that I don’t have any copper coloured, and if you want a coloured glitter to show up really well, stick it onto something which is as close a colour match as you can get. If you put it on white it just doesn’t pop in the same way and black can change the colour quite radically. I tied two fairly extravagant bows of double-faced satin ribbon, and glued them to the top of the ornament so it looks nice from both sides. Then added the copper sparkly ’joy’ and job done.

joy-bauble-1

Photo taking was a bit of an adventure. It is really not easy to do a bauble justice if you don’t have a tree to hang it on! I held it in the sunlight (I know, sunlight in the UK in November. Put it in your diary!) to show how sparkly the copper glitter is.

I also wanted to hang it though, so rigged up a makeshift hook from a silver pipe cleaner, pegged some black card to the curtain and hoped for the best. Here is the ‘warts and all’ zoomed out shot!

joy-bauble-photo-booth

I bought these gilding flakes quite some time ago now and I haven’t used them nearly enough. You can use stamps with the Flitterglu or like I did here, cover a whole area. The tubs of flakes are in single colours or several different colour combinations, some warm coppers, rose and gold and some cool greens and silver with slivers of gold or copper too. All are luscious. Please excuse me, I gotta go gild something. Where are the gloves?


Please, don’t eat the daisies!

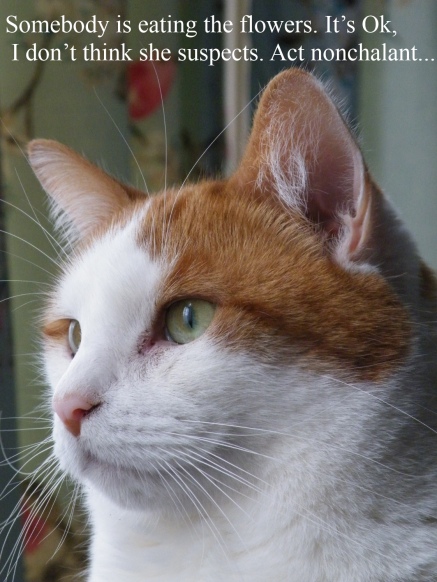
The title of a Doris Day film. Also, a sentence oft spoken in our home this week, in a slightly different way. As in no ‘please’ and no ‘daisies’. More like ‘Stop eating the flowers!’ or just ‘stopitstopitstopit’ whilst wresting the paper pulp from the cat’s jaws. Don’t get me wrong, it is nice that he involves himself with my hobby, but eating the hobby is not the way to go.

daisy-eating-riley

This is a WIP. My sister made some bare naked Christmas baubles (UK English) or ornaments (USA English. Hmmn, don’t know where Canada sits on this one?) to decorate. We thought it would be fun, given we both have quite large and very different stashes and quite divergent crafty leanings. I collected my orbs a few weeks ago but haven’t done much so far. I know I need to be more Christmas orientated but I think that is where I fall down. I really cannot get in the festive mood this early. But I had a naked ornament to decorate. Fun, right? I have never done this before. The base is a kid’s plastic ball, a wire hanger added and then covered in a textured papier mache layer.

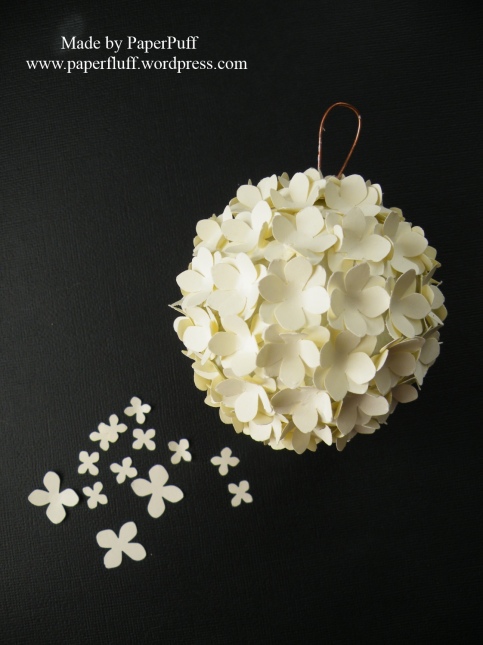
Now to get going! I’m not certain where this particular bauble or ornament will end up, but it is a start. So with the ’not yet’ feeling in mind I deliberately travelled the ‘not Christmas’ road with my first effort, and started by punching many, many paper flowers to cover it with. In fact each flower you can see is two layers, offset a bit. I am not sure how many it took. I started making a circle around the middle, which took 16 whole ‘flowers’ for a bauble measuring about 6-7cm diameter. I had hoped I would just eyeball it and get a beautiful encirclement to meet up in the middle, without actually mapping or drawing it out. Fail to plan, plan to fail, came to mind as my circle was so ‘off’ by the time I had made it around the circumference once that one end was clearly heading north without a backward glance. To visit Santa, presumably. But actually it didn’t matter. Maybe I was lucky, but I just kept going and managed to cover it all without any odd gaps or some being more closely squashed together than others.

flower-bauble-1

I think I am going to finish it off with a gentle dusting of glitter and some pearls here and there. I may also cover the wire with ribbon or tissue paper. If anyone has any good ideas feel free to stick them in a comment – I have plenty more baubles!

Supplies (possibly the shortest list ever): a Martha Stewart punch. It hasn’t got a name on it and I bought it so long ago I can’t remember!